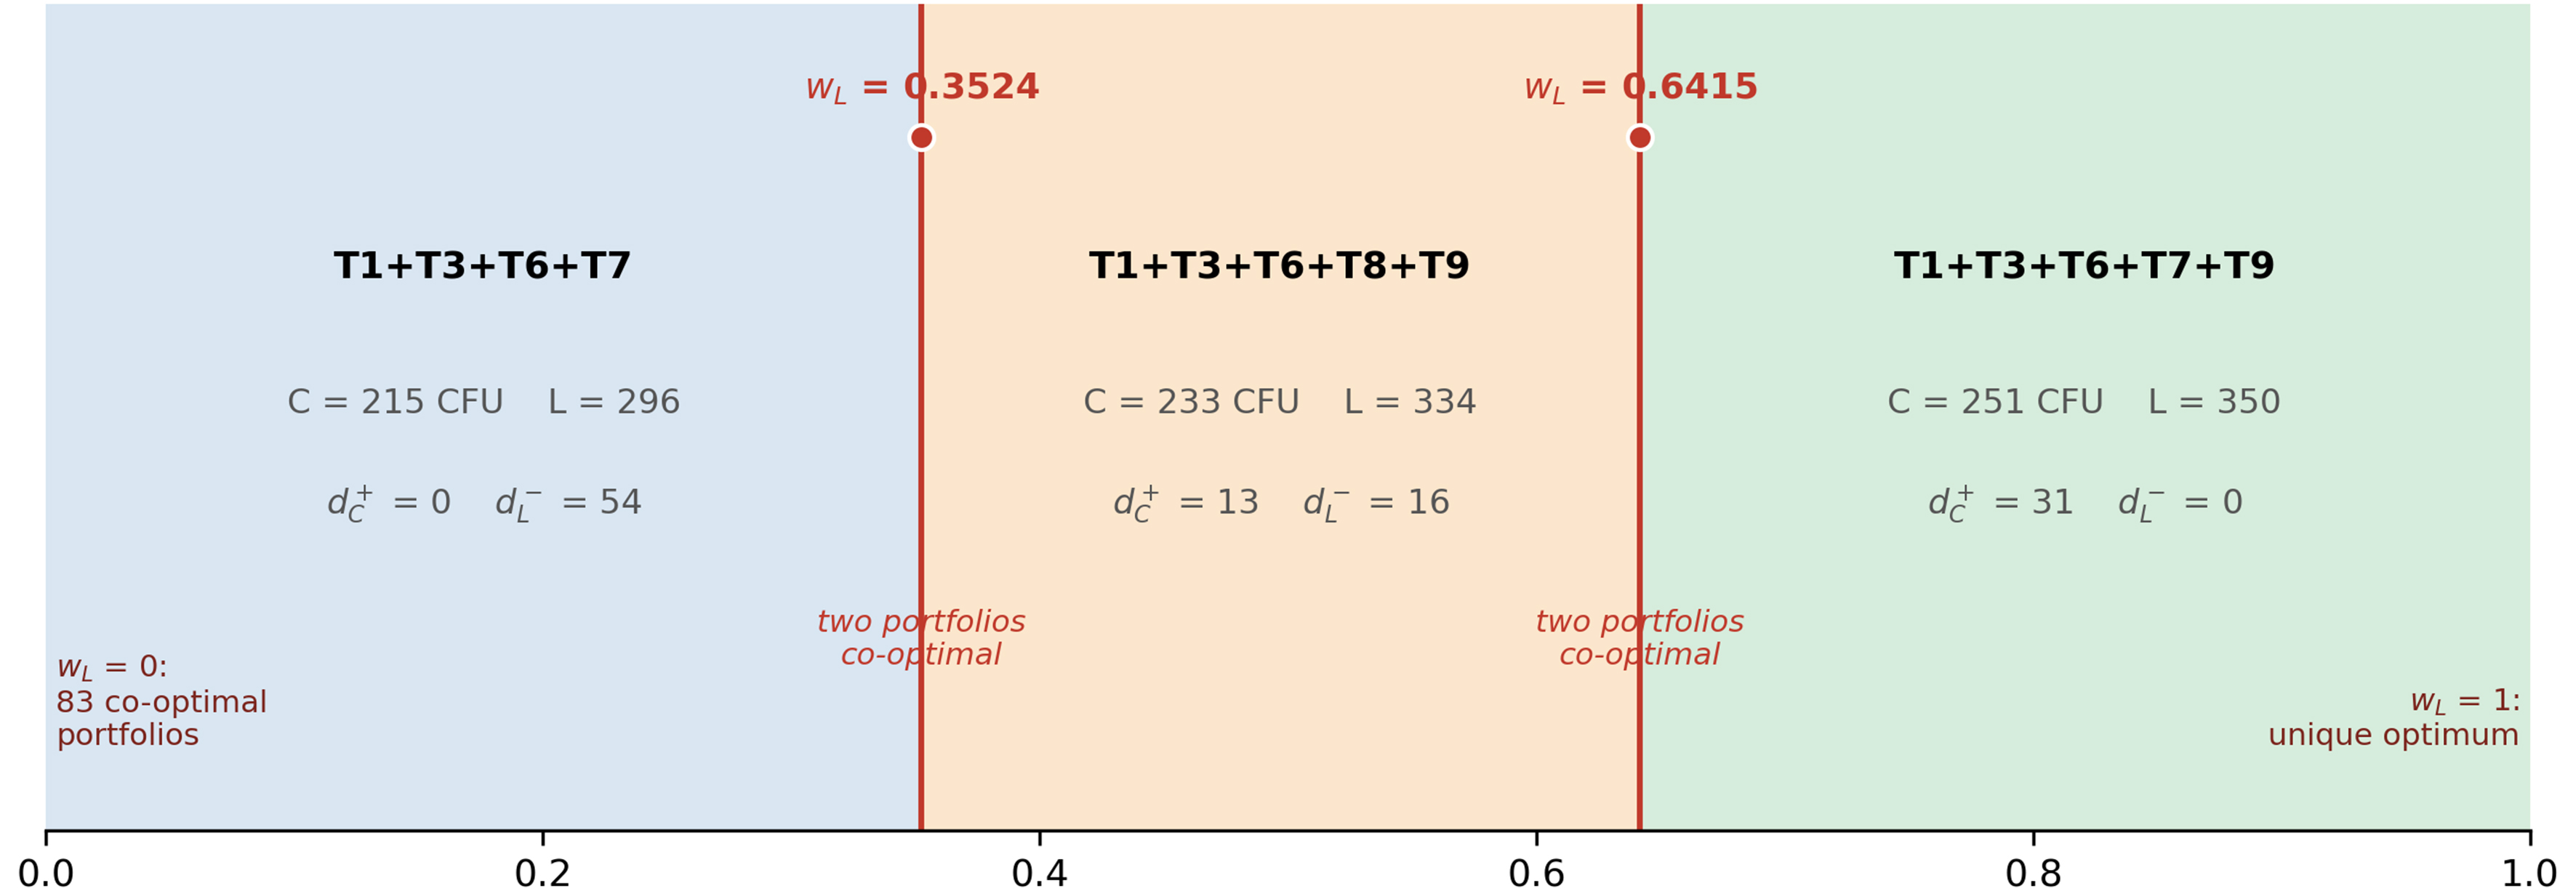
Figure 9. Weight regions and breakpoints of the optimal portfolio.
All published articles are preserved here permanently